跳到内容
跳到内容 


You want a crystal-clear product, but samples have bubbles, haze, and marks. This ruins the look, causes delays, and wastes money. The fix isn't magic; it's about controlling key factors.
To solve clear molding problems, you must precisely control the material, process, and mold. Start with properly dried, low-MFR material1. Use a slow, low-temperature injection process2. Finally, ensure your mold has smooth runners3 and stable temperature control4 for a flawless, optically perfect finish5.

This sounds simple, but the real success is found in the details of each step. These issues are a constant battle between achieving optical perfection and managing the many variables of the injection molding process. Let's break down each area so you can avoid these headaches and get the perfect clear parts you envisioned for your project.
How can the right material choice prevent defects from the start?
You selected a clear plastic, but it still looks cloudy or has bubbles inside. You might blame the molding process, but the real problem could be the material itself. It’s a frustrating cycle of adjustments. The secret is to choose and prepare your raw material correctly before it even enters the machine.
Prevent clear plastic defects by selecting a grade with a low Melt Flow Rate (MFR)6. Also, ensure it has a narrow molecular weight distribution. Most importantly, you must thoroughly dry the material according to its specifications. This step eliminates moisture, the primary cause of bubbles and streaks.

I believe that many molding defects are born long before the plastic is melted. It all starts with the raw material. Selecting the right grade and preparing it perfectly sets the foundation for a flawless part.
The Fight Against Haze and Cloudiness
The Melt Flow Rate, or MFR, tells you how easily the plastic flows when melted. A high MFR plastic flows very easily. But this also means its molecular chains can break down more easily under the high pressure and heat of injection molding. This breakdown, called shear degradation, is a major cause of cloudiness. I recommend choosing a material with a lower MFR. It’s a bit tougher and resists degradation, which helps maintain its optical clarity7. Think of it as a stronger chain that won’t break under stress.
The Critical Role of Drying
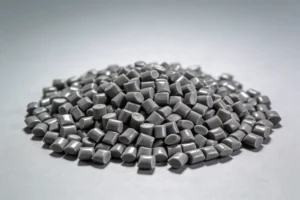
Many clear plastics like PC and PET are hygroscopic. This means they act like sponges, absorbing moisture directly from the air. When these wet pellets are heated in the machine's barrel, that moisture turns to steam. This creates ugly bubbles or silver streaks in the final part. It also causes a chemical reaction called hydrolysis8, which weakens the plastic. Proper drying isn't just a suggestion; it's the most critical first step for achieving transparency.
| Material | Drying Temperature | Drying Time |
|---|---|---|
| PC | 120°C | 4-6 hours |
| PET | 160°C | 4 hours |
| PMMA | 80°C | 2-4 hours |
How do you fine-tune the injection process for optical perfection?
Your clear parts come out with ugly white marks or dents on the surface. These flaws completely ruin the premium look you were aiming for. You can fix this by mastering the injection process. The key is to manage heat, speed, and pressure very carefully during the injection cycle.
For optical perfection, use a "low temperature, slow injection" strategy. This reduces internal stress, which causes whitening. You must also use a multi-stage holding pressure9. A high initial pressure fills the part, and a lower second pressure prevents sink marks10 as it cools.

The injection process is a delicate balancing act, especially with clear materials. From my experience, rushing the process with high speeds and temperatures is the fastest way to create a box of expensive scrap. It’s about giving the material time to flow and settle correctly.
The "Low and Slow" Injection Strategy
When you inject molten plastic too quickly, you stretch and pull the long molecular chains. They get frozen in this stressed position as the plastic cools. This creates internal stress, which you can see as white marks or cloudy patterns called stress whitening11. To avoid this, I always use a slower injection speed. I also lower the barrel temperature by 5-10°C compared to what I'd use for an opaque part. This gentle approach allows the molecules to flow into the mold without creating this built-in stress, resulting in a much clearer part.
Using Holding Pressure to Beat Sink Marks
Sink marks are small dents or depressions on the surface. They happen when the plastic shrinks as it cools, and there isn't enough material to fill the void. This is a common enemy of thick-walled clear parts. My solution is to use a segmented holding pressure9 stage. Right after the mold is filled, I apply a high holding pressure9 to pack out the part. Then, as the outer layer starts to solidify, I reduce the pressure. This allows the inner part to cool and shrink without pulling the surface inward, keeping it perfectly flat and optically smooth.
Why is your mold design12 the final key to a flawless finish?
You’ve got the right material and the perfect process settings. But you still see tiny black specks13 or distorted, wavy lines in your parts. This can be incredibly frustrating. The problem isn’t the material or the machine; it's hiding in the design of your mold.
To get a flawless finish, your mold's runners and gates must be perfectly smooth, with no sharp corners. Using circular main runners and fan-shaped gates helps the plastic flow gently. You must also keep the mold temperature14 stable and high enough to prevent stress from being locked in.

I often tell my clients that the mold is the ultimate template for their product's quality. For clear parts, this is even more true. Every tiny imperfection in the steel will be perfectly replicated in the plastic. There is simply no room for error.
Smooth Pathways Prevent Black Specks
Black specks are usually tiny bits of burnt plastic. They form when a small amount of molten plastic gets trapped in a sharp corner or a rough spot in the runner system. It sits there, cooks, and then breaks off into a later shot. To prevent this, the entire path the plastic travels must be smooth and polished, with no "dead spots." I prefer to design molds for clear parts with full-round runners and fan gates. This design allows the plastic to flow smoothly and evenly, like water in a clean pipe, without any place for material to get stuck and degrade.
Stable Mold Temperature for Optical Stability
Internal stress doesn't just cause white marks; it can also bend light as it passes through the part, creating an effect like looking through cheap, wavy glass. This optical distortion is often caused by the mold being too cold. When the hot plastic hits a cold mold wall, it cools too quickly, freezing stress into the surface. The solution is to heat the mold to a stable temperature just above the material's glass transition temperature (for PC, this is usually 80-120°C). This allows the plastic to cool slowly and relax, releasing internal stress and ensuring perfect optical quality.
Conclusion
Solving clear molding problems requires a complete strategy. You must focus on optimizing the material, fine-tuning the process, and perfecting the mold design12. This approach ensures a flawless, optically perfect result every time.
Reference
Learn about the significance of low-MFR materials in preventing defects during the molding process. ↩
Find out how a slow, low-temperature injection process can enhance the quality of your molded parts. ↩
Understand the critical role of smooth runners in achieving high-quality molded products. ↩
Explore how maintaining stable temperature control can improve the quality of your molded parts. ↩
Discover expert tips on achieving an optically perfect finish in your injection molding projects. ↩
Gain insights into how MFR impacts the flow and quality of plastics during the molding process. ↩
Discover techniques to ensure optical clarity in your clear plastic products. ↩
Explore the effects of hydrolysis on plastics and how to mitigate its impact during molding. ↩
Find out how managing holding pressure can eliminate defects in your molded parts. ↩
Explore effective strategies to prevent sink marks and ensure a flawless finish. ↩
Discover the causes of stress whitening and how to prevent it in your molded products. ↩
Learn about best practices in mold design to achieve high-quality, clear molded parts. ↩
Understand the causes of black specks and how to prevent them for better quality. ↩
Learn about the ideal mold temperature to achieve optimal results in clear plastic molding. ↩