跳到内容
跳到内容 

Struggling with burnt PVC parts or warped results? Your temperature settings are likely wrong. Getting this right is crucial for producing high-quality parts every single time.
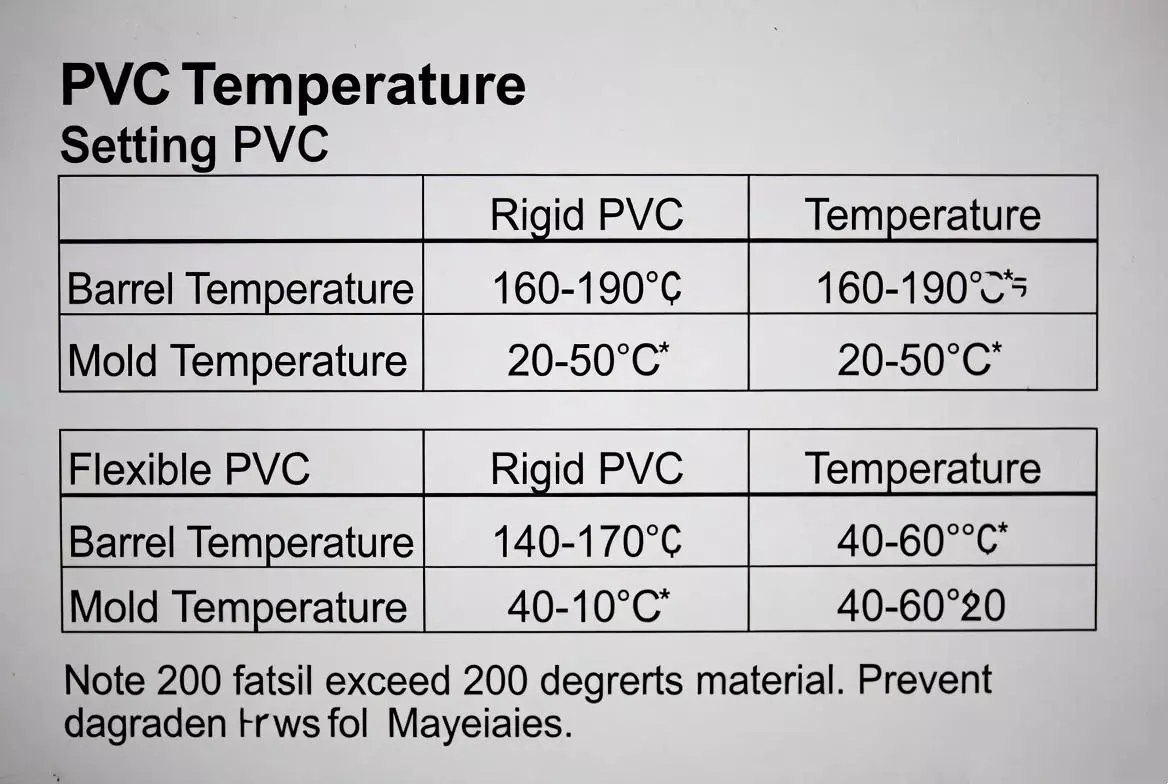
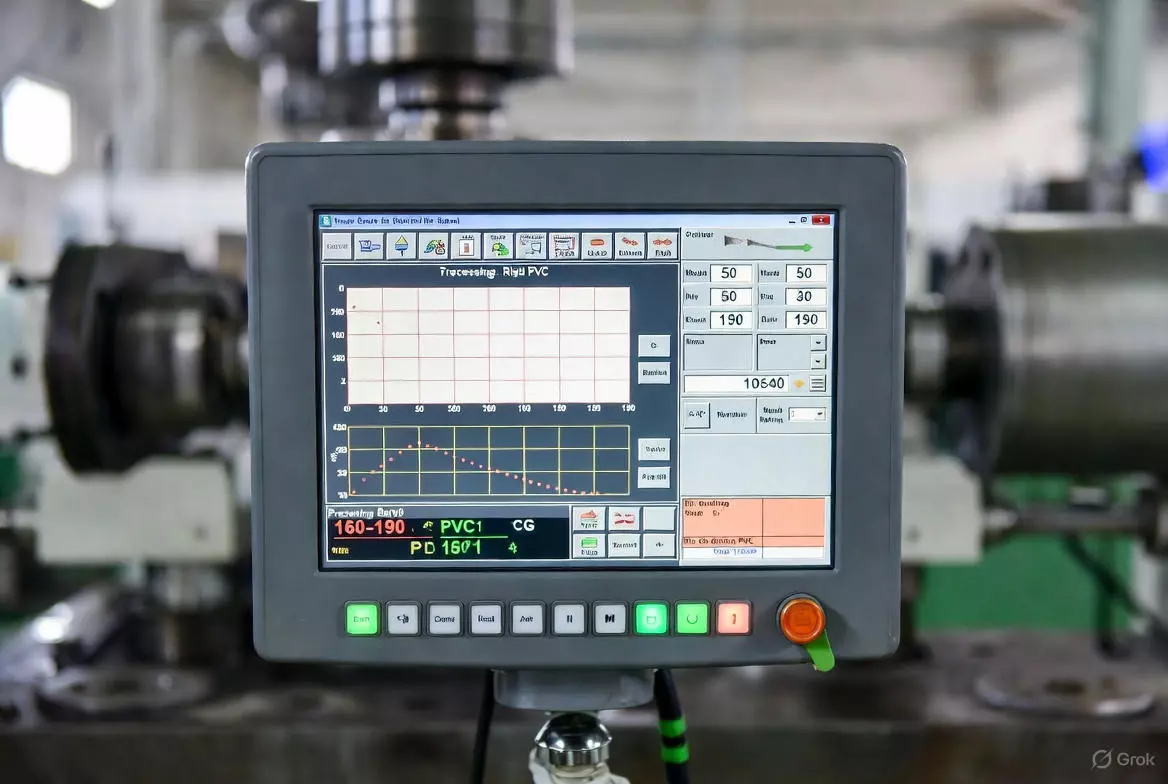
For rigid PVC1, set the barrel temperature between 160-190°C and the mold at 20-50°C. For flexible PVC2, a lower barrel temperature of 140-170°C and a warmer mold of 40-60°C is ideal. Crucially, never let the melt temperature exceed 200°C to prevent material degradation.
Getting the basic temperature ranges is a good start. But there is much more to it than that. The real expertise comes from understanding why these numbers matter and how to fine-tune them for your specific project. Let's dig into the details to make your PVC molding process3 a success.
How do barrel and mold temperatures differ for rigid and flexible PVC?
Are your rigid PVC parts too brittle? Are your flexible parts not filling the mold completely? The balance between your barrel temperature and your mold temperature is often the problem.
Rigid PVC needs a higher barrel temperature (160-190°C) but a cooler mold (20-50°C) to ensure dimensional stability. In contrast, flexible PVC uses a lower barrel temperature (140-170°C) and a warmer mold (40-60°C) to help the material flow smoothly into complex shapes.
The barrel and mold serve two different purposes, and you have to treat them that way. The barrel's job is to melt the plastic pellets into a consistent, flowable state. The mold's job is to cool that molten plastic back into a solid shape. I always tell my team that you can't get one right without understanding the other. For PVC, this is especially true because of the difference between its rigid and flexible forms.
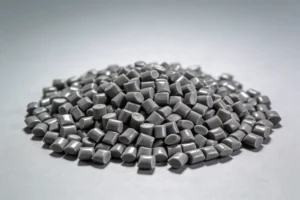
Understanding Rigid PVC (uPVC)
Rigid PVC has no plasticizers, so it's naturally more viscous and harder to melt. You need higher barrel heat to get it to flow. We typically set our machines in three zones: front at 160-175°C, middle at 170-185°C, and rear at 175-190°C. However, the mold needs to be cool, preferably around 30-40°C. This cool surface quickly solidifies the outer layer of the part, which helps prevent excessive shrinkage and warping. It locks the part's dimensions in place.
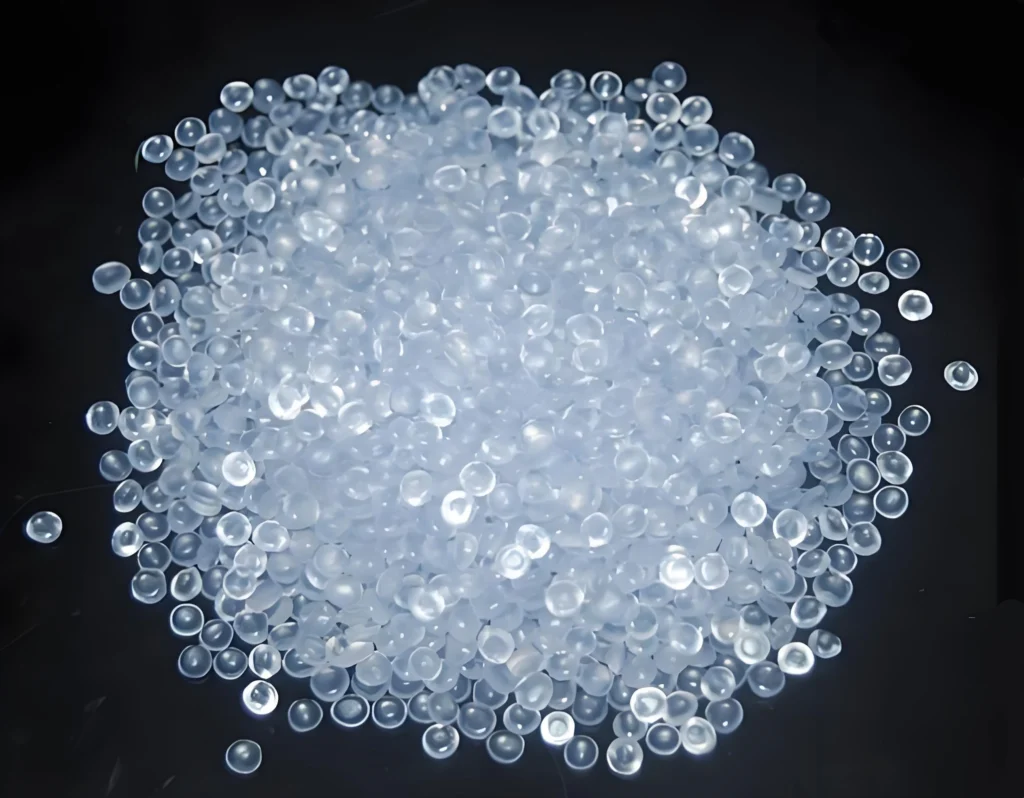
Working with Flexible PVC
Flexible PVC contains plasticizers, which act like lubricants between the polymer chains. This makes the material melt at a lower temperature and flow much more easily. We can lower the barrel temperature across all zones to around 140-170°C. But here, we want a warmer mold, usually between 40-60°C. This keeps the material fluid for a little longer, giving it time to fill every tiny detail of a complex mold before it freezes off. We used this exact technique for a client who made soft-touch grips for electronic devices, and it was the key to achieving a perfect surface finish.
| PVC Type | Barrel Temperature Range | Mold Temperature Range | Key Consideration |
|---|---|---|---|
| Rigid PVC | 160°C - 190°C | 20°C - 50°C | Cool mold prevents shrinkage and ensures stability. |
| Flexible PVC | 140°C - 170°C | 40°C - 60°C | Warm mold improves flow for complex geometries. |
Why is PVC's heat sensitivity a critical factor in temperature settings?
Have you ever opened a mold to find yellowed, weak parts and a sharp, unpleasant smell? You have likely degraded your PVC. This material is incredibly sensitive to heat, and ignoring its limits will cost you time, money, and material.
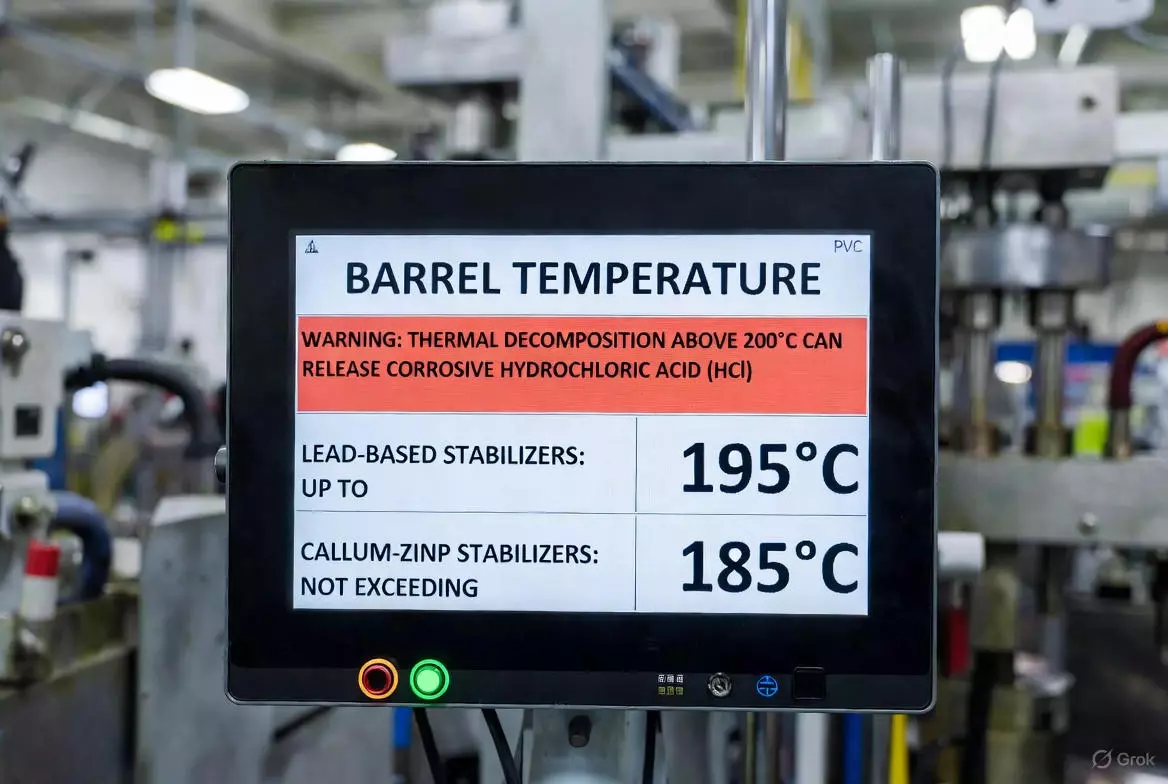
PVC is a thermally sensitive polymer. It begins to decompose above 200°C, releasing corrosive hydrochloric acid (HCl). Your temperature settings must be compatible with the heat stabilizer in the material. Lead-based stabilizers can handle up to 195°C, while modern calcium-zinc stabilizers should not exceed 185°C.
I learned a very hard lesson about PVC's heat sensitivity4 early in my career. A new operator, trying to speed up a cycle, pushed the barrel temperature to 210°C. The parts came out dark yellow and were so brittle they snapped in your hand. Worse, we had to shut down the machine for a full day to clean the corrosive HCl residue off a very expensive mold. That mistake taught me to always respect the material's limits. PVC is not like other plastics. When it gets too hot, it doesn't just melt more, it chemically breaks down.
The Role of Heat Stabilizers
Raw PVC is unstable. Material suppliers add heat stabilizers to prevent it from degrading during processing. The type of stabilizer used dictates your upper temperature limit.
- Lead-Based Stabilizers: These are very effective and allow for processing temperatures up to around 195°C. However, due to environmental concerns, their use is declining.
- Calcium-Zinc Stabilizers: This is the common eco-friendly option. They are less robust, so you must keep your melt temperature below 185°C to be safe.
Residence Time is Everything
It's not just about the peak temperature. The amount of time the PVC spends in the hot barrel, known as residence time, is just as important. If the material sits in the barrel for too long, it will start to degrade even at a "safe" temperature. We have a strict rule in our facility: PVC residence time must not exceed 5 minutes. If a machine has to be stopped for any reason, we purge the barrel completely before restarting. This prevents degraded material from getting into our parts and damaging our equipment.
Can you just raise the temperature to improve PVC flow?
Your PVC is not filling the mold, causing frustrating short shots. The simple fix seems to be cranking up the heat, right? This is a common impulse, but it is a mistake that can create more problems than it solves.
No, you should not rely only on heat to improve flow. While raising the temperature by 10°C can lower PVC viscosity by about 30%, it also significantly increases the risk of degradation, yellowing, and high internal stress in the final part. A better method is to balance temperature with other factors.
Relying on high temperatures to solve flow issues is a trap. You might fix the short shot, but you will likely create other defects. The parts might look good coming out of the mold, but they could have high internal stress, making them prone to cracking later. I've seen this happen with a client's project for automotive dashboard components. The original molder used excessive heat to fill the thin sections. The parts passed initial inspection but started developing stress cracks a few months later. We took over the project and found a better way.
The Downside of High Heat
When you push the temperature too high, you walk a fine line with degradation. The material can turn yellow, lose its impact strength, and release corrosive gases. Even if you don't see visible burning, the high heat can induce stress into the part as it cools rapidly in the mold. This locked-in stress is a hidden defect waiting to cause a failure down the line.
A Smarter Way to Improve Flow
Instead of just adding more heat, we look at the whole system. A balanced approach is always better.
- Use Processing Aids: We often work with our material supplier to add an ACR (Acrylic) processing aid. This modifier acts like a lubricant between the PVC melt particles, helping them slide past each other more easily without needing extra heat.
- Optimize Screw Speed: The screw's rotation also generates heat through friction. We carefully control the screw speed to ensure we get a consistent melt without adding too much frictional heat. Too fast, and you risk shearing and degrading the material. Too slow, and the cycle time suffers.
- Slight Temperature Increase: Only after optimizing these other factors do we consider a small, controlled temperature increase within the safe processing window. It should be the last resort, not the first.
How should you adjust temperatures for different PVC part thicknesses?
Are your thin-walled parts failing to fill completely? Are your thick-walled parts5 showing ugly sink marks and voids? Your one-size-fits-all temperature profile is failing you. The part's geometry is the most important guide for setting your process.
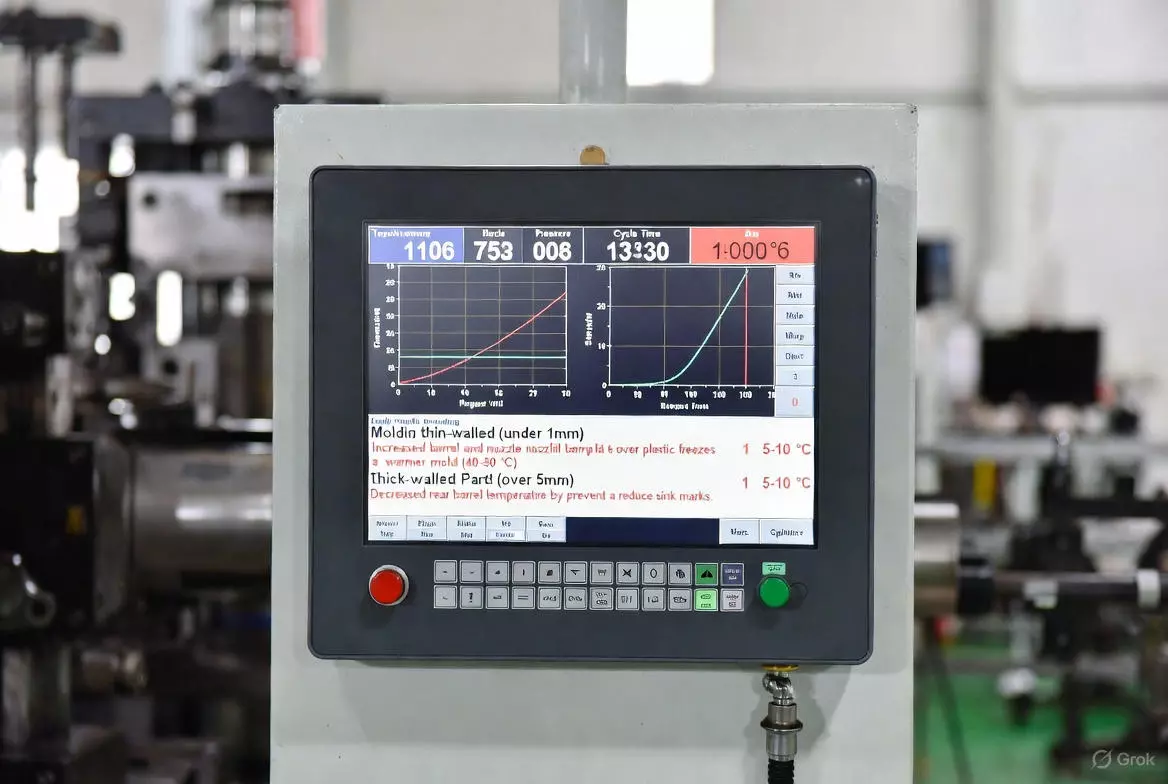
For thin-walled parts (under 1mm), slightly increase the barrel and nozzle temperature by 5-10°C and use a warmer mold (40-50°C) to ensure the mold fills completely before the plastic freezes. For thick-walled parts (over 5mm), slightly decrease the rear barrel temperature by 5-10°C to prevent overheating and reduce sink marks.
We once worked on a project for a set of educational toys. The product line included both large, chunky building blocks and small, thin connector clips, all made from rigid PVC. Using a single machine setup was a disaster. The thin clips had short shots because the plastic froze before it could fill the tiny features. The thick blocks came out with deep sink marks because the core was still molten while the outside was solid. It was a perfect example of why you must tailor your process to the part. We had to create two completely different processing sheets to get it right.
Tackling Thin-Walled Parts
Thin walls are a race against time. The molten plastic has to travel through a narrow space and fill the cavity before it cools and solidifies.
- Increase Melt Temperature: A modest 5-10°C bump in the barrel and nozzle temperatures gives the melt a bit more energy to make the journey.
- Increase Mold Temperature: A warmer mold (around 40-50°C) keeps the flow path open for a fraction of a second longer, which is often all that is needed to achieve a complete fill.
- Increase Injection Speed: A faster injection speed helps push the material into the cavity before it has a chance to cool.
Mastering Thick-Walled Parts
Thick sections present the opposite problem. The outside of the part cools and solidifies while the core remains molten. As the core finally cools and shrinks, it pulls the solidified outer walls inward, causing sink marks6.
- Decrease Rear Barrel Temperature: We often lower the temperature in the rear zone of the barrel by 5-10°C. This helps prevent the material from getting too hot too early, reducing the overall heat that needs to be removed from the part.
- Longer Cooling Time: The most important factor is giving the part enough time in the mold to solidify all the way through. You need to extend your cooling time significantly for thick parts.
- Lower Mold Temperature: A cooler mold helps pull heat out of the part more efficiently, leading to a more uniform cooling process from the outside in.
| Part Feature | Barrel Temperature Adjustment | Mold Temperature Adjustment | Key Goal |
|---|---|---|---|
| Thin Walls (<1mm) | Increase by 5-10°C | Increase to 40-50°C | Fill the cavity before the material freezes. |
| Thick Walls (>5mm) | Decrease rear zone by 5-10°C | Decrease to 20-30°C | Prevent sink marks and ensure uniform cooling. |
Conclusion
Mastering PVC temperature is a delicate balance. You must control both barrel and mold settings, respect the material's strict heat limits, and adapt your process for every unique part design.
Learn about rigid PVC's properties to optimize your injection molding process and avoid common pitfalls. ↩
Explore the advantages of flexible PVC for applications requiring enhanced flow and flexibility. ↩
Get a comprehensive overview of the PVC molding process to enhance your production efficiency. ↩
Understanding PVC's heat sensitivity can help you avoid costly mistakes and improve product quality. ↩
Understand the unique challenges of thick-walled parts to improve your molding outcomes. ↩
Learn effective strategies to avoid sink marks and ensure a smooth finish on your parts. ↩